DIY wall art ideas for a personalized home
Advertisement
DIY wall art ideas for a personalized home allow you to express your style through creative techniques, meaningful materials, and strategic placement to transform and enhance any living space.
DIY wall art ideas for a personalized home can transform any ordinary space into something extraordinary. Have you ever considered how your wall decor reflects your unique personality? Let’s dive into some creative notions that could inspire you.
Understanding the basics of DIY wall art
When it comes to DIY wall art, understanding the basics is essential for creating pieces that truly reflect your style. There are several key elements that can help you get started. Firstly, consider the type of art that resonates with you. Do you gravitate toward vibrant colors or more subdued tones? This choice can influence your entire project.
One of the most important aspects of DIY wall art is selecting the right materials. Having a range of supplies at your disposal can ignite your creativity. You can use canvases, wood panels, or even reclaimed materials. Depending on your preferred design, you might need paint, brushes, adhesives, and various tools. Exploring these options can be exciting and inspiring.
Advertisement
Essential Materials for Your Projects
- Canvases or wood panels
- Acrylic or watercolor paints
- Glue and adhesives
- Brushes and sponges
Once you have your materials ready, it’s time to sketch out some ideas. Think about the themes you enjoy—whether it’s nature, abstract designs, or quotes. Sketching helps organize your thoughts and visualize the final product. You can also look for inspiration online to spark your creative flow.
Choosing a Style
With your sketches in hand, you can start choosing a style for your DIY wall art. Remember, personal expression is key! Do you prefer modern minimalism or bohemian flair? This decision can guide color schemes and shape choices. The beauty of DIY art is that there are no strict rules; the only limit is your imagination.
Remember to experiment! You might discover new techniques or combinations of materials that work wonderfully together. Keep your mind open to adjustments as you create. The process should be enjoyable and fulfilling, as you see your vision come to life on the wall. Embrace this journey of creativity and let your personal style shine through your artwork.
Advertisement
Materials you need for creating wall art
When diving into creating wall art, having the right materials makes all the difference. Careful selection empowers your creativity and helps you achieve stunning results. Start by gathering a variety of supplies that suit your style and planned projects.
One of the basic materials you’ll need is a canvas or a wooden panel. Canvases are great for painting, while wood can add a rustic feel. You might also consider using recycled materials—like old doors or windows—to create unique art pieces. These options not only save money but also make your art eco-friendly.
Essential Art Supplies
- Acrylic paints for vibrant colors
- Brushes in different sizes for various techniques
- Glue for assembling mixed media pieces
- Spray sealant to protect your finished artwork
Don’t forget about tools like stencils, sponges, and pallets. Stencils can help you create shapes and patterns with precision. Sponges are perfect for adding texture to your art. Using a palette will help you mix colors seamlessly, ensuring a smooth application of paint.
Optional Decorative Elements
In addition to basic supplies, consider adding decorative elements. Items like fabric scraps, beads, or even photographs can enhance your wall art. These can offer a personal touch that reflects your unique story and interests. By combining various textures and materials, you can achieve depth and intrigue in your designs.
Lastly, keep in mind that creativity often leads to experimentation. Don’t hesitate to try new combinations of materials. You might discover interesting effects by layering different items or using unconventional tools for application. Embrace the process of creation, and let your imagination flourish as you select your materials.
Step-by-step guide to different projects

Creating DIY wall art can be an exciting journey. To help you get started, here’s a step-by-step guide to different projects that you can tackle. Each project highlights unique techniques and styles to bring your vision to life.
Choose a project that inspires you. Whether it’s a painted canvas, a collage, or something more unconventional, having a clear idea will set you on the right path. Gather your materials and prepare your workspace. Make sure to have all your supplies ready to ensure a smooth process.
Project 1: Abstract Canvas Painting
For creating an abstract canvas painting, follow these steps:
- Select a canvas size that fits your wall space.
- Choose at least three paint colors that complement each other.
- Start by painting the background with a base color.
- Use sponge brushes or your fingers to create texture and layer different colors.
Allow it to dry completely before hanging it up. This piece can be a great conversation starter!
Project 2: Photo Collage
A photo collage can add a personal touch to your decor. Here’s how to make one:
- Gather your favorite photos or prints.
- Choose a large canvas or poster board as your base.
- Arrange your photos in a design that fits your theme.
- Use glue or double-sided tape to secure the images.
This project not only showcases your memories but also serves as a stunning display in your home.
Project 3: Nature-Inspired Wall Art
For a more earthy project, consider making nature-inspired wall art. Begin by:
- Collecting leaves, flowers, or small branches from your backyard.
- Press them flat between books to dry.
- Once dried, arrange them on a canvas or frame.
- Use clear adhesive to mount them in place.
This is a wonderful way to bring the outdoors inside, adding a fresh and organic feel to your space.
Throughout each project, remember to let your creativity shine. Don’t be afraid to modify the steps to match your personal style. The more you experiment, the better your art will be. Enjoy the process, and watch your ideas come alive on your walls!
Tips to enhance your DIY wall art
Enhancing your DIY wall art can elevate its impact and ensure it stands out in your home. Small adjustments and creative techniques can make a big difference. Let’s explore some practical tips to help you take your artwork to the next level.
One effective way to enhance your art is by playing with color combinations. Consider using a color wheel to find complementary colors that pop against each other. This approach not only draws attention but also creates visual harmony in your space. Mixing different shades of the same color can add depth and richness to your pieces.
Incorporate Textures
Adding texture can give your art a unique flair and interest. Here are some ways to incorporate texture:
- Use thick paint or gels to create raised designs.
- Incorporate materials like fabric, lace, or sand for added dimension.
- Try layering different mediums, such as paint over paper.
This layering technique can create a stunning visual effect, making your wall art truly one-of-a-kind.
Frame Your Artwork
Framing is an excellent way to showcase your art. A good frame can elevate the look of your piece, making it appear more professional. Choose a frame that complements the colors and style of your artwork. For a modern look, opt for a sleek black or white frame, while vintage frames can add a charming touch to rustic pieces.
Lighting Matters
Consider how lighting affects your wall art. Well-placed lighting can highlight your artwork and draw attention to its details. Use picture lights, sconces, or even natural light to your advantage. Experiment with different light sources to see how they change the overall feel of your space.
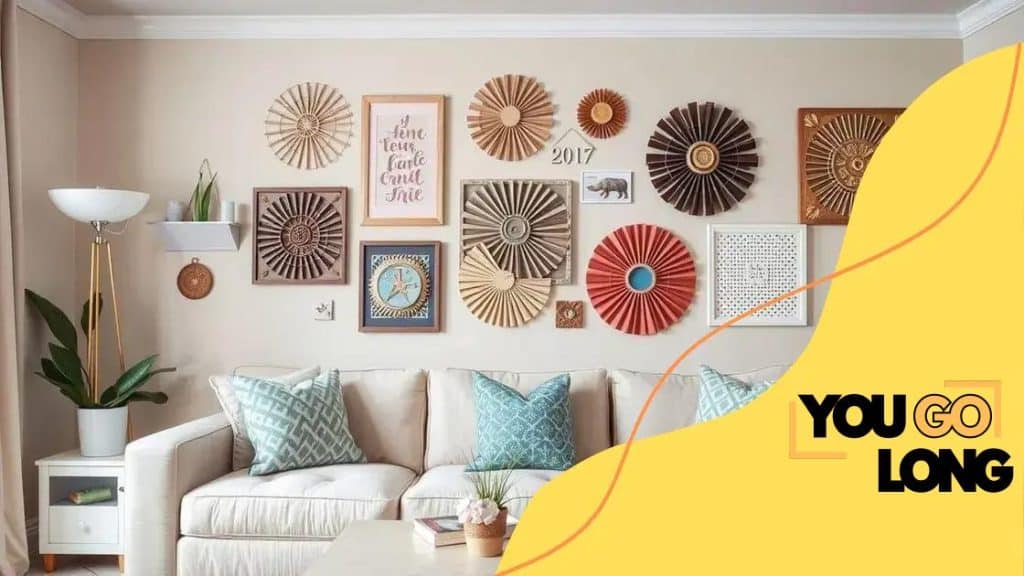
Don’t hesitate to arrange your wall art in a gallery style. Grouping different pieces together can create a dramatic focal point. Mix and match sizes, colors, and styles for an eclectic feel. Make sure to arrange them at eye level to make the most of the display.
Finally, keep experimenting! The key to enhancing your DIY wall art is to have fun and let your creativity flow. As you explore new techniques and styles, your confidence will grow, leading to even more personalized creations. Embrace every opportunity to express your unique style in your home.
How to personalize your living space with art
Personalizing your living space with art can transform it into a reflection of your personality and style. Utilizing DIY wall art is a great way to achieve this. Start by considering the colors that dominate your decor. Choose art pieces that either complement or contrast these colors to create a visually appealing look.
Another way to personalize your space is by showcasing art that tells a story or has meaning to you. This can be family photos, travel memorabilia, or pieces that represent your hobbies and interests. By incorporating these elements, you create an environment that feels uniquely yours.
Selecting the Right Location
The placement of your artwork is crucial. Here are some tips for selecting the right locations:
- Hang artwork at eye level to create an inviting atmosphere.
- Group smaller pieces together for a gallery wall effect.
- Place larger pieces on walls that need a focal point.
Pay attention to the lighting in your space as well. Natural light can enhance the colors in your art and make the space feel more dynamic. Consider using accent lighting to highlight specific pieces, creating a visual flow throughout the room.
Mixing Different Styles
Don’t be afraid to mix styles. Combining modern art with classic pieces can create an interesting contrast that adds depth to your decor. Consider incorporating various textures, sizes, and mediums. For example, a bold abstract painting can coexist beautifully with a collection of vintage photographs.
Additionally, keep rotating your art pieces. This not only keeps your living space fresh but also allows you to enjoy different pieces over time. It’s an exciting way to experiment with your decor without a permanent commitment.
By focusing on personal meaning, strategic placement, and a variety of styles, you can successfully personalize your living space with art. Ultimately, the goal is to create an environment that speaks to you and enhances your home’s atmosphere.
FAQ – Frequently Asked Questions about DIY Wall Art
What materials do I need to start making DIY wall art?
You will need canvases or wooden panels, paints, brushes, glue, and optionally, decorative elements like fabric or beads.
How can I choose the right art style for my space?
Consider your personal tastes and the colors in your room. Mixing modern and vintage styles often creates a dynamic look.
What is the best way to arrange my wall art?
Hang your art at eye level and consider a gallery style by grouping smaller pieces together for visual interest.
How often should I change my wall art?
Rotating your wall art regularly keeps your space feeling fresh and allows you to enjoy different pieces over time.


