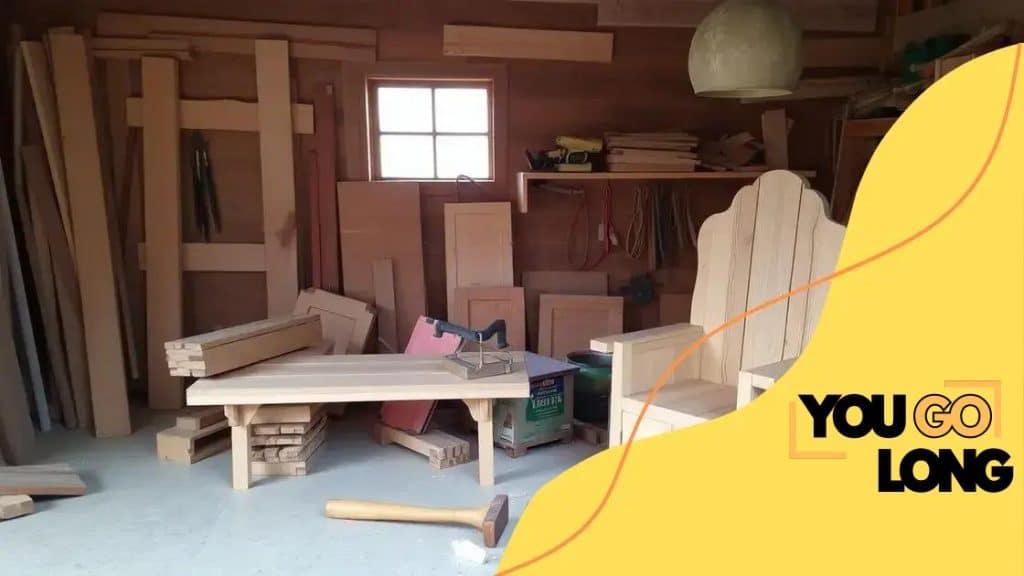
How to build your own home furniture with minimal tools
Advertisement
Building your own home furniture with minimal tools is achievable by understanding design principles, gathering essential tools, and following clear steps for assembly and finishing.
Have you ever thought about how satisfying it is to create something with your own hands? How to build your own home furniture with minimal tools is an exciting journey that many have embarked on, allowing for both creativity and practicality. Let’s dive into how this can transform your living space!
Understanding basic furniture design principles
To create amazing furniture pieces, it’s essential to grasp the basic furniture design principles. These principles guide you in making choices that not only look good but also work well in your space.
Balance and Proportion
Balance refers to the visual weight of your furniture. It can be symmetrical or asymmetrical. Symmetrical balance creates a formal look, while asymmetrical balance feels more casual. Proportion is about the relationship between the sizes of your furniture and the space around it. Making sure your furniture fits well in the room is crucial.
Advertisement
Functionality
Always consider how the furniture will be used. This involves looking at two main aspects: ergonomics and durability. Ergonomics ensures comfort, allowing users to interact efficiently with furniture. Durability means your pieces should withstand daily use without falling apart.
Materials and Textures
The materials you choose will impact both appearance and functionality. For instance, wood gives a warm and natural feel, while metal adds a modern touch. Mixing different textures can also add depth, making your furniture more visually interesting.
Color and Finish
Color plays a huge role in design. Remember, lighter colors can make a room feel larger, while darker shades can add warmth. The finish on the furniture can affect its style as well, from matte to glossy.
Advertisement
Understanding these principles will empower you to make informed decisions when planning and building your own furniture. As you continue on this creative journey, keep experimenting with different designs and ideas! Each piece is a unique reflection of your personal taste.
Essential tools for DIY furniture
When diving into DIY furniture projects, having the right tools is essential. The tools you choose will not only save you time but also help you achieve professional-looking results.
Basic Hand Tools
Every DIYer should start with a collection of basic hand tools. These tools are versatile and easy to use, making them perfect for beginners. Important hand tools include:
- Screwdriver: A must-have for assembling and disassembling furniture.
- Hammer: Useful for driving nails and fitting pieces together.
- Hand saw: Great for making precise cuts in wood.
- Measuring tape: Ensures your pieces are the right size.
Power Tools
While hand tools are essential, investing in a few power tools can greatly enhance your DIY experience. These tools make tasks easier and faster, allowing for complex projects to be completed with less effort. Consider adding these to your toolkit:
- Power drill: Ideal for drilling holes and driving screws quickly.
- Jigsaw: Perfect for cutting curves and intricate shapes in wood.
- Circular saw: A powerful tool for straight cuts on larger pieces.
As you gain confidence in your DIY skills, you may find more specialized tools beneficial. An orbital sander is useful for achieving a smooth finish, while a router adds decorative edges to your furniture pieces.
Equipping yourself with the right tools is crucial for successful DIY furniture projects. Start with the basics and gradually expand your toolkit as your skills and projects grow. Each tool opens up new possibilities for creativity!
Step-by-step guide to building a coffee table

Building your own coffee table can be a rewarding experience. By following a few simple steps, you can create a beautiful piece of furniture that fits perfectly in your living space. This guide will walk you through each step, making the process easy and enjoyable.
Gather Your Materials
Start by selecting the materials for your coffee table. Some common materials include:
- Wood boards: Choose hardwood like oak or pine for durability.
- Screws: Use wood screws suitable for the thickness of your wood.
- Wood glue: This will help strengthen your joints.
- Sandpaper: Essential for smoothing edges and surfaces.
Cutting the Wood
Measure and cut your wood to the desired dimensions. A standard coffee table is about 18 inches high and 48 inches long. Be precise with your measurements to ensure a good fit. If you don’t have a saw, many hardware stores offer cutting services.
Assembling the Table
Begin by assembling the top of the table. Lay out the wood pieces, then use wood glue at the joints and screw them together. Make sure everything is square and aligned. For added support, you can add a cross brace between the legs and the table top.
Finishing Touches
Once the table is assembled, it’s time to sand the surface. This step is crucial as it will remove splinters and prepare the wood for finishing. After sanding, apply a stain or sealant to protect the wood. Let it dry thoroughly before using your new coffee table.
Building a coffee table can be a fun project that results in a piece you can use and admire. Take your time and enjoy the process, as each step contributes to a beautiful final product.
Tips for finishing and styling your furniture
Finishing and styling your furniture can transform a simple piece into a stunning focal point in your home. These tips will help you achieve a professional look with minimal effort.
Choosing the Right Finish
The finish you select can dramatically affect the appearance of your furniture. Here are popular options:
- Stain: Enhances the natural wood grain and adds color without obscuring the texture.
- Paint: Offers a variety of colors and finishes, allowing for customization to match your decor.
- Varnish: Provides a protective coating that is durable and often enhances the wood’s shine.
Applying the Finish
Preparation is key when applying your finish. Start by sanding your furniture to create a smooth surface. This helps the finish adhere better. After sanding, clean off dust with a cloth. Depending on the finish:
- Staining: Use a brush or rag to apply the stain, following the grain of the wood.
- Painting: Use a high-quality brush or roller for an even coat, and apply multiple layers if necessary.
- Varnishing: Apply with a clean brush in long strokes, allowing to dry between coats.
Once your finish is dry, inspect your work. If needed, a light sanding between coats can create an even smoother result.
Styling Your Furniture
After finishing, styling is where creativity shines. Consider these ideas to enhance your furniture:
- Accessorize: Use decorative items like books, plants, or candles to add character.
- Layering: Place table runners, placemats, or trays on surfaces to create texture.
- Mix and Match: Combine different materials and colors to make your furniture stand out.
With the right finishing techniques and styling tips, your furniture can become unique pieces that reflect your personal style. Embrace the process and have fun with it!
Troubleshooting common DIY furniture issues
When embarking on DIY furniture projects, challenges can arise. Knowing how to troubleshoot common issues can save you time and effort while enhancing the outcome of your projects.
Uneven Surfaces
If your furniture has uneven surfaces, it can be frustrating. This problem is often caused by improper cutting or assembly. To fix this, start by checking the legs of your furniture. Make sure they are all the same length. If they’re not, you can use small furniture pads or shims to level them out. Sanding any high spots can also help create a flat surface.
Loose Joints
Loose joints can weaken your furniture over time. If you notice that pieces are separating, it’s important to address this issue promptly. Adding wood glue to the joint and clamping it until it dries is a good solution. If the joint is significantly damaged, consider reinforcing it with screws or brackets for added strength.
Paint or Stain Problems
Sometimes, the finish doesn’t come out as expected. If your stain is too dark or the paint is peeling, start by sanding the affected area. After this, apply a primer before repainting. For stain issues, multiple thin coats can provide a more even look. Test your paint or stain on a scrap piece of wood before applying it to your furniture for the best results.
Scratches and Dents
Scratches or dents can occur during use. For minor scratches, try using a wood filler or a crayon that matches the color of your wood. For deeper dents, you can apply steam using a wet cloth and a hot iron to raise the wood fibers. This works well for small indentations and can restore the surface.
Being prepared to troubleshoot these common issues will help you achieve a beautiful and functional result in your DIY furniture projects. Embrace the learning process and enjoy your creative journey!
In summary, building your own furniture can be a fun and rewarding experience! By understanding design principles, using the right tools, and following steps to troubleshoot common issues, you can create stunning pieces that fit your home perfectly. Remember to embrace creativity and enjoy the process. Your efforts will result in unique furniture that reflects your personal style.
FAQ – Frequently Asked Questions about DIY Furniture
What tools do I need to start building my own furniture?
Basic hand tools like a screwdriver, hammer, and measuring tape are essential, along with a power drill and saw for more complex projects.
How can I troubleshoot uneven surfaces in my furniture?
Check the legs for proper length and use furniture pads or shims to level them out, or sand down high spots for a flat surface.
What type of finish should I use on my DIY furniture?
Stain enhances natural wood grain, while paint allows for customization. Choose based on the look you want to achieve.
How do I handle scratches or dents on my finished furniture?
For minor scratches, use wood filler or a matching crayon. For deeper dents, apply steam with a wet cloth and iron to raise the wood fibers.


